Sunday 29 November 2015

Stamping Sundays: Arctic Creatures

Todays stamping sunday post is something lovely a wintery for everyone snuggled up this evening! I used a combination of decals made on my Uber Mat, and regular stamping straight onto my nails. I used Barry M's silver foil effect polish, they stamp so well! All colours used for this design were Barry M but I used my Nails Inc Kensington Caviar top coat as usual. I really can't fault it!


The stamping plate used is from Mo You's new(ish) Enchanted Collection and it plate number 05. it has a variety of arctic creatures framed in wintery patterns, and some additional patterns at the bottom. I'm really taken with the enchanted plates, the tropical one is particularly good too, I like the little snake and iguana.

I learnt from my last stamping post (here) to place my mat over a light coloured surface so that I can see i'm filling in the designs completely. This worked much better this time, I think the main images being smaller helped too. The decals I made were placed on my thumbs, ring fingers and index fingers. With the remaining ones I stamped the designs straight on.

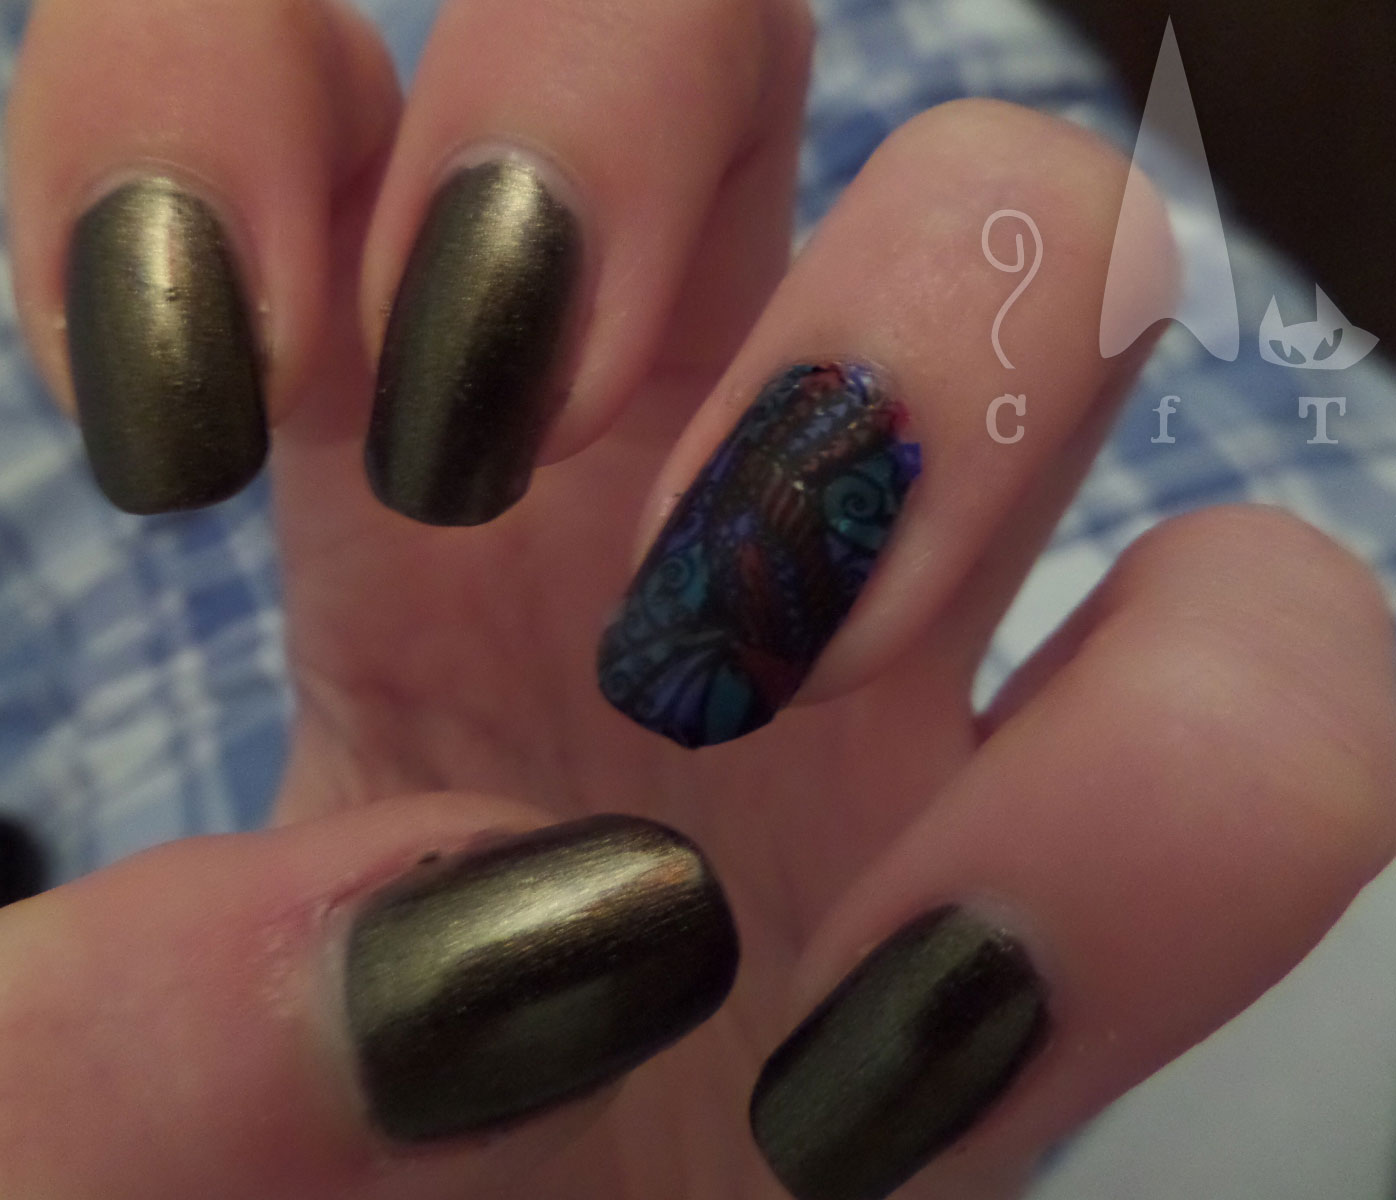
Learnt a couple more things from this mani too. Firstly placing the bottom of the image at the bottom of my nails rather than starting from the middle as I've done with larger patterns meant I didn't end up with a mess around my cuticles. Sides are much easier to clean! The other is that I have always read to put the decals over a wet/tacky layer of polish and have done this previously. however with this design I forgot and let it dry completely. Therefore if I accidently put a decal on wrong I could just peel it of and replace!

Overall I'm pleased with how this turned out, hope you like it too!

Colours Used: Cobalt - Barry M, Silver Foil - Barry M, Matt White - Barry M, Cappuccino - Barry M, Kensington Caviar - Nails Inc

Saturday 28 November 2015

HPB Presents: Glitterchrome

The time has come for another Hobby Polish Bloggers link up. I almost missed this one as I've been so busy at work I haven't been checking the group as much, glad i've managed to get it done last minute as I really enjoy doing these. This months theme is Monochromatic Mani, creating a design all in one colour (or varying shades).

As it's that time of year I've gone for glitter, I'm having a major glitter moment! I picked blue as it's my favourite colour, and have tried a gradient as i've been wanting to have another go at gradients for a while now, they often seem to end up in my summer designs which feel so far away now! It's only really visible in the close ups but I have done a two tone blue gradient underneath the glitter, and then added to different glitters over the top.

The first blue glitter is one of Barry M's first ever glitters which I've had for years, and to be honest smells a little concerning! But I figured as it was over two polishes already it probably wouldn't do too much damage (fingers crossed!). The final one is a beautiful Nails Inc glitter with varying sizes and it's just so shiny, I wasn't sure about this mani at first but the final glitter made it!


Colours Used: Atlantic Road - Barry M, Bruton Place - Nails Inc, Blue Glitter - Barry M, Royal Archade (Saphire) - Nails Inc

Make sure you check out the other entries below!


Sunday 22 November 2015

Stamping Sundays: Stained glass - take one

Todays stamping blog post is another work in progress. I really love the colours but the advanced stamping didn't quite go to plan so only ended up lasting me a day or two. However I think I learnt a fair bit in the process, so hopefully the next time I attempt larger decals it will work a little better. I've generally had better luck with smaller designs, such as the tiny turtle nails I did for my sister a couple of months ago.This was my first attempt at decals using my new Uber Mat so had lots of fun trying that out! The stamping plate used is from Mo You's Gothic collection and is Gothic Plate number 10.

For today's post I'm going to list a few things I learnt from this design and hope will be useful pointers, but before that I would like to rave about Butter London's British Racing Green! I got this as a birthday present and this was the first time I used it. It's got a lovely smooth consistency, as I've found with all the Butter London polishes I've tried, and the colour is so strong and shiny! The pictures below are using two coats, but it's almost opaque in one.


Colours Used: British Racing Green - Nails Inc, Black Knight - Mo You, Sprint Finish - Barry M, Indigo, Barry M, Wigmore Street - Nails Inc

Advanced stamping on Uber Mat - what I learnt:
  • If using a mat to make decals, make sure it is over a light surface. The corner of the mat which contained my decals was over the edge of my laptop, meaning I couldn't see very well if I was leaving little gaps, which as you can see above it turned out I was!
  • Make sure the colours on your decals contrast enough. The dark blue and dark purple I used look quite different in the bottle, but once they are shrunk down onto tiny nail designs they are pretty hard to distinguish from one another, making the design a tad less colourful.
  • When placing the decals on your nail, make sure the bottom of the design is at the bottom of the nail, rather than just placing it on and cleaning the excess after. Cleaning around the sides and top of the nail is easy but trying to clean gloopy decal from the cuticle area is harder!

Friday 20 November 2015

Monthly Indie Review: ILNP

I'm very excited to be sharing this months indie polish review with you! I actually swatched these colours around the same time as posting last months review so I've been dying to share them for some time now. I don't know where to start. This. Polish. Is. AMAZING!! I carefully chose two shades to try, and now i'm carefully trying to resist buying all of them, they're just so beautiful! So first of all they come in lovely little black boxes with heart shaped gaps so you can get a peak at the colours. The bottles are pretty too and have a matte lid which is easy to grip.
First up is Black Orchid, this is one that I just had to have as soon as I saw it. Very much my kind of colour. It's lovely rich dark redish purple, the sort of thing that's very in this season, but I don't think i've seen anything quite like it. I had high expectations of this polish and it didn't disappoint! It catches the light beautifully and is packed with shimmer and gentle glitter. Absolutely radiant! This is two coats.


The second colour I chose was Flower Girl, this is quite different to the sort of thing I normally go for, I'm not much of a pink person, but I loved how delicate it looked, and the champagne sort of tint to it. I wonder if they do a champagne shade?! This came out a little pinker than expected, but it's not too obtrusive! The gentle colour and shimmer make it such an elegant shade. There's a lovely holographic shimmer to it which just gives it that extra something. Beautiful in two to three coats.


I don't think I can choose a favourite out of these. before I tried them I liked Black Orchid best but I don't know now, they're just too beautiful! For my fellow UK nail obsessives you can purchase these at Rainbow Connection. I think they are more readily available in the US. I will be avoiding this site until I have bought everyones Christmas presents as I think it could be very dangerous for my bank balance! I hope you enjoy these polishes as much as I do! TTFN!

Thursday 19 November 2015

Throwback Thursday: New Year Tartan

Today's throwback is the nail art I did for last years new year celebrations. It brings back fond memories! One of which was using a giant chocolate box to lean on while I tried this lovely (and new at the time) OPI red. I copied this design from a few I've seen floating around on Instragram and Pinterest, again as it's an older one I wouldn't have the foggiest who to credit it to!

I used a small nail art brush to draw the lines across my nail in black, and filled in the lines (avoiding the squares where they overlap) with a burgundy shade. I then added two thinner lines in gold. Was fairly simple to do and I'd definitely give it another go. It feels quite Christmassy to me but as it's not explicitly Christmas themed I think it would work for either of the autumn and winter seasons.


Colours used: Red Hot Rio - OPI, New York Noir by Kate Spade - Nails Inc, Kensington High Street - Nails Inc, Gold - Limited Collection Polish at M&S

Tuesday 17 November 2015

Matte Metallic Criss Cross

Matte metallics, one of my favourite creations in nail polish! I first came across them when a friend got me three of Topshops for my birthday last year (in dark blue, dark green and black). This was my first try of the green one and it was love at first sight! I have since ended up with a further four, oops! I think Topshop were one of the earlier places to start doing these but they are now around a lot more, most prominently in Barry M's silk collection and Zoya's satins (still need to try Zoya, they look so beautiful!).

Below is Topshops Shameless with a patterned accent nail to jazz it up. The green is perfect for the season, dark and mysterious but with a bit of shimmer and subtle sparkle. I think the matte effect really brings out the intensity of the colour. For the accent nail I used a black striping brush and some loose glitter I got in  a Seventeen. The glitter had a vaguely green tint to it which was brought out by being next to the darker green. Can't wait to get the matte metallics out again this year!


Colours used: Shameless - Topshop, Matt White - Barry M, Nail Art Pen - Seventeen, Nail Glitter - Seventeen

Monday 16 November 2015

Barry M Party Season Colours: First Taste

As promised, my swatches/ reviews of Barry M's delicious new-ish party season polishes. I love them so much! These were given to me as a birthday present by my sister, and I'm very glad as I probably couldn't have found an excuse to get them otherwise!

So first up is Sparkling Amethyst, a lovely rich dark purple with a whole lot of shimmer. Both are somehow part way between a glitter and a shimmer, they don't quite have glitter chunks/pieces in them but they're a lot more sparkly than what I would normally call a shimmer polish. If that makes sense! This colour is perfect for the season, and the whole of autumn and winter, it's a lovely dark colour and catches the light just perfectly. Even better, it's a one coater! It comes out fairly thick but easy to paint with and covers evenly in one coat.


Next up is Sparkling Ruby, possibly my favourite, but that might just be because it's the one I wore second! This one is the ultimate Christmas polish, but still works for the rest of winter two. The classic red with an extra glamorousness to it. Again, it's packed with shimmer and catches the light beautifully. It's worth mentioning with both of these as well that they have the wide brush like the new Speedy polishes which makes application a dream. This one was also a one coater though very slightly less opaque that Sparkling Amethyst. I don't think there's much else I can say about these too, they are really beautiful and I love them! Barry M have done super well here.

Sunday 15 November 2015

Stamping Sundays: Seafood Special

New stamping plates to show today, yaayy! I got three delightful new Mo You plates from my sister for my birthday and this was my first use. I have just received a bunch more I've ordered online so there will be much more of this to come. I used a matte grey from Topshop as a base and then used my three new birthday polishes for the design (Barry M's two holiday specials and British racing green from Butter London). You can't quite see the glitteryness of the Barry M's here but they do stamp well with a bit of shimmer. I'm hoping to have my swatches/reviews up of those during the week.

The plate I'm using here is number 12 from the cookbook collection.which has a seafood theme. I'm not a fan of actual seafood but I love sea creatures so this plate is perfect as it's entirely sea themed, I will probably just skip the shrimp on a fork pattern! I've tested different patterns on each hand and I love how they look. The shell patterns are my favourite, especially the one on my little finger. I think it looks like wrapping paper!

There has been a theme over my birthday and Christmas last year of lobster themed presents (bottle opener, slippers etc) so I believe this plate was the perfect way to continue this tradition!


Colours used: Easy Peasy - Topshop, British Racing Green - Butter London, Sparkling Ruby - Barry M, Sparkling Amethyst - Barry M

Friday 13 November 2015

N'awww Narwhal

Todays blog post is a throwback to when I was a nailwhal! I must do this again. As with a lot of my older pictures, this was inspired by a design on Pinterest, but I cannot find where to credit the original one to so please let me know if you know.

I'm very fond of this design for it's sheer cuteness, and who could fail to notice the adorable little creature in my hand?! I started with a base of Barry M's Cobalt blue, and then sponged on some metallic teal/blue with scrunched up cling film/ saran wrap. I like the colour it made, especially because it is unique!  The narwhal was very easy to do, I used the brush in the polish bottle for her head, and nail tape for her horn. I then outlined this with a nail art pen, and used a dotting tool for her eye.

Under my ring finger there there is the base of her horn, but it looks a lot better with the nails together. I like the need to match it up though, it's like a nail jigsaw!


Colours Used: Cobalt - Barry M, Teal - Barry M, Matt White - Barry M, Nail Art Pen in Black - Barry M, New York Noir - Nails Inc

Wednesday 11 November 2015

Party Sprinkles

I've found this design floating around in my nail art folder and am delighted to share it! The design itself is not one of mine. I took inspiration from Pinterest, if anyone knows who did the original please let me know so I can credit them. So it's a replica, but I'm really pleased with how it turned out.

There's not an awful lot to say about how it was done. I used a beige base on the accent nails, and then used a dotting tool to apply the different colours. I particularly like the unusual range of colours, I would place this as a spring or summer design but think it can work for any time of year. Besides I couldn't wait till next spring to share! Over the top I've used Nails Inc's plumping gel effect top coat for some extra shine. It's a lovely shiny topcoat but I've since acquired their Kensington Caviar one which is even better as it's just as shiny and dried so fast!


Colours Used: Basil Street - Nails Inc, Tate - Nails Inc, Cyan - Barry M, Notting Hill Carnival - Nails Inc, Wardour Street - Nails Inc, Peach Melba - Barry M, Coconut - Barry M, Blue Moon - Barry M, Plum - Barry M

Sunday 8 November 2015

Stamping Sundays: Advanced Stamping Take One

Today's stamping post is my first attempt at advanced stamping with large images. I did it experimentally so only tried it on an accent nail, and I'm pretty pleased with how it went. The only downside it that the base colour is quite dark, so the pattern didn't show up as well as it could have done. For this design I used Born Pretty stamping plate 04 which I purchased on ebay.

For those of you who are not familiar with advanced stamping, it is an ingenious technique which looks so tricky but is actually satisfyingly simple! The design is picked up with a stamper and the gaps are filled in with a tiny brush or dotting tool (as the picture will be flipped before being applied to the nail this allows for some painting over the lines!). I used dotting tools as I felt they gave me more precision. Once all is filled in and dry a generous layer of top coat is applied and left to dry, there is quite a lot of drying time required!


Once dry, the design can be peeled of the stamper. This is the bit I thought would be really difficult but it was surprisingly sturdy, and as my stamper is squishy I could just press the sides down so it peeled off easily. Next I carefully applied the design to my nail. this is easier with a small design like the turtles I posted a few weeks back. With a large image I found there was some bubbling which was hard to get rid of, a little like sticky back plastic. The beauty of a decal made of nail varnish is that clean up is a dream!

I've really enjoyed advanced stamping, and due to the arrival of some new stamping plates for my birthday there will be a lot more to come!

Colours used: Anne Teak - Freckles Polish, Black Knight - Mo You, Baker Street - Nails Inc, Red Hot Rio - OPI, Block Your Green - Rimmel

Saturday 7 November 2015

Purple Aztec Party Nails!

I've been very naughty and haven't blogged since last Saturday! The longest time since I re-started in July. In all fairness it has been my birthday week though so I've not had much time. Due to this I'll be showing two designs today, based on one of my favourite colour combinations. I associate the colour purple with November so will be showing two bright purple designs below.


Both these designs are from a little while back, and the above I tried first. It was experimental as I wasn't sure how well the colours would work together but was very pleased with the result. The black and white designs where outlined with a Barry M nail art pen, and then filled in with black acrylic paint. The silver is from the Nails Inc Galaxy collection and is one of my favourite glitters, this was the first time I tried it, It's so multi-dimensional and shimmery.

The below design was done as a revisit to the colour combination. This one was just done with a Barry M nail art pen. I think I like the first one best. What do you think?


Colours used: Holland Park - Nails Inc, Trafalgar Crescent Galaxy Polish - Nails Inc, Matt White - Barry M, Nail Art Pen in Black - Barry M, Black Acrylic Paint